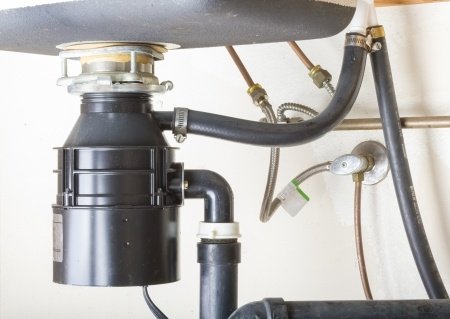
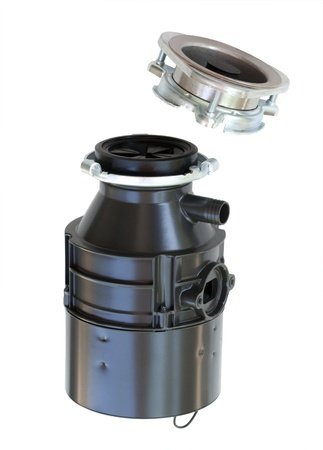
 Garbage disposals have one of the messiest jobs in the home. Due to all the wear and tear on a typical garbage disposal the average homeowner will likely have the privilege of replacing at least a few. Replacing a disposal is usually not considered a very difficult plumbing job and can be completed in a short amount of time. Whether it’s an emergency plumbing job or a routine installation, the following information details tips and strategies for replacing your garbage disposal at different points throughout the process.
Getting Started
The first step when replacing a garbage disposal is to make sure the power is turned off. After that you can safely remove the drain pipes, wire connectors, and hose clamp if there is a dishwasher. Make sure to place a cloth or towel snugly in the main drain to prevent any leakage. The next step is to loosen the sink flange so the disposal will drop down and then can be removed. Remove any putty that is left around the opening of the sink. A screwdriver or a small, sturdy butter knife can be used to scrape away any residue.
 Providing Support
A garbage disposal can weigh 10 to 15 pounds or more. It’s a good idea to set up some kind of support underneath the disposal so you don’t have to worry about catching it with your free hand when it finally comes loose. You can use a small box, crate, can, or blocks of wood for a solid support. Leave about a half inch gap so the disposal has a small space to drop down when it finally comes off. It’s important to remember that disposals fit to the sink fittings in a variety of ways. Hose clamps, threaded nuts, and mounting rings are all used to attach disposals to sink fittings. Mounting rings, however, are used most often. To remove this type it’s necessary to rotate counter-clockwise the mounting ring that is located along the top.
Removing the Snap Ring
A screwdriver or knife can be used to quickly and easily remove the old snap ring. Insert the screwdriver at the break in the ring, right between the flange and the ring. Pull the screwdriver down and around the ring. This should cause the ring to pop off smoothly. Each part should now easily come loose. The entire mounting assembly should be wiped clean of any old putty and residue.
 Reattaching the Drain
Before installing the new disposal you’ll need to replace the drain assembly. Use plumbers putty along the counter and press the drain onto the hole of the sink. The washer and backup ring must also be placed back onto the drain, followed by the mounting flange and finally the retaining ring. Tighten all bolts until the drain is secure in the sink. Any excess putty should be wiped off.
Attaching the New Disposal
It’s usually better to wire the new disposal before it’s installed. Gently push the top end of the new disposal into the mounting assembly. Turn the lower part of the disposal (the mounting ring) to the right until it feels secure. Use a pair of pliers to lock in the tabs over the top of the ridges. Make sure the outlet of the disposal is facing the drain connections. It’s now time to reinstall the drain lines.
When looking for a Miami plumbing company or a Fort Lauderdale plumbing company make sure to contact A to Z Statewide Plumbing. We are a full service plumbing company offering everything from replacing a faucet to re-piping an entire building. For residential or commercial services including garbage disposal repair, contact A to Z Statewide Plumbing for more information. A to Z can also provide you with great service if you need a Pembroke Pines plumbing company or a Hollywood plumbing company.


Comments